Little Wife On the Prairie


When you are everything to everyone, well, you had better act like you have it all together.


Showing posts with label Prairie Recipes. Show all posts

Tuesday, October 14, 2014

The best thing about Fall.

You know how there are those special smells that pull you into a time or a feeling?  For some people, Fall cannot happen without breathing in the steam from that first pumpkin spiced whatever.  Some people it is the mellow, earthy smell of cool dirt and rotting leaves.  Others love the stinky heat of a football locker room. 
 
 The best thing about Fall in our house is the smell of fire-roasted green chile.  I have to inhale the smokiness of the charred skins before I can move on into the season.
 
One way we love to celebrate this time is with lots of family of course!  The Mullins Chile Roast of 2014 gave us what we were craving.  The wind was high so we moved the operation indoors.  We are very thankful for the dirty old barn! It wasn't ideal but it sure was convenient.
 
Matt's artwork
 
A busy roaster!

Mouth-watering


The men did most of the roasting and prepared our tasty lunch of tortillas and fresh-roasted chile.  Oh my gosh!


Beautiful girl!

Little tootie!!  I love you!


All sorts of games to play in the barn.

Slam dunk Micah!

When these bald heads get together, there is no telling what they will come up with!

This looks like a serious conversation.


We got to try something new this year.  We are used to having our red chile in powder form.  We got some fresh this year and roasted it.  It is sweet and fruity but stills spicy.  It is sooooo good!


The girls did the bagging.  We put up over 200 bags of chile!  It might last us through the year.  If we are conservative!


Tuesday, September 23, 2014

Kombucha, 51-100 gifts

I am all about fermented foods.  I believe the gut is the center of our health.  I have fermented cucumbers, yogurt and now tea!  Kombucha is a fermented tea drink that aids in gut health by adding beneficial bacterial and helping to detoxify the liver and regulate digestion.  We have all heard of pro-biotics.  This is just a cheap and delicious way to get some into your diet. 
There are tons of online resources about Kombucha.  This is the one I used.  Kombucha Mamma gives a great history and step-by-step on how to brew your own.  She gives the why and how which I love! 
I got a jump-start on my experience thanks to a new friend I found on Facebook.  Pat, the SCOBY lady gave me a kit to start my own brew.  I was so happy to have the help and to get a very healthy and productive SCOBY.  Thank you Pat for being a teacher!
(Please click on the SCOBY link to learn all about it!)
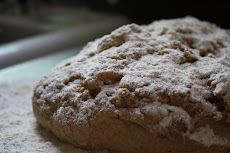
This is what Pat gave me.  Such a precious gift!  It is my first SCOBY and some starter liquid.


 Per Pat's advice, I started by brewing 3 green tea bags and 2 black tea bags.  I used only organic products for this brew.

After the tea steeped for 10-15 minutes, I added the organic cane sugar.  This sugar is not for the drinker but for the drink.  The yeast consumes the sugar during fermentation so the sugar content ends up being very low.  A good brew tastes more sour than sweet.
I found this spigot jar at Walmart.  I didn't want to invest a bundle until I knew that I would continue to brew. (This jar was around 10 dollars.)  Before I put anything in this container, I washed it with hot water and sanitized it with white vinegar. 

I then carefully dumped the SCOBY and starter into the jar.

Once my brewed tea and sugar mix was completely cool, I poured it on top.  I felt like there was something else to do but all that was left was to wait.

Look how cool that is!!!

 The brew needs to be covered with a cotton cloth to keep out bugs but let in air.  I used a flour-sack towel and a rubber band.  I tucked it into a corner in my kitchen where it could stay warm and out of the direct light.

I let my brew ferment for 7 days and then tasted it.  It was delicious!  Sour and flavorful.  So I decided to try a second ferment to add some fruit flavor.  I drained some of the brew into a glass bottle with a lid.  I added some frozen raspberries!  I left it on the counter for 3 more days, burping it each day to keep the bottle from exploding. (The ferment puts off gasses)  Then I popped it in the fridge.  When it was chilled, I poured it over ice and enjoyed it!  I did not get a lot of fizz.  I think my bottle was too big.  But it was so good and the color was beautiful!  This is too much fun.


I am continuing my gifts journal.  I just have not shared it here.  So here is the next set of gifts in my life...

51.  when he brings me coffee
52.  hugging Levi's tears away
53.  finishing the laundry
54.  20-minute naps
55.  painting something the perfect color
56.  "His Eye is on the Sparrow"
57.  Jolie's sense of humor
58.  colored glass
59.  the distant train's moan
60.  ceiling fans
61.  when Jolie can't stop talking
62.  salty and sweet
63.  baby bellies
64.  when he puts his warm, strong hand on the small of my back
65.  driving a big truck
66.  good days with the kiddos
67.  my first Palace cappuccino
68.  watching my babies become their own people
69.  Micah's squishy arms around my neck
70.  simple and comfortable cotton undies :)
71.  when things just work out
72.  taking shoes off at the end of a long day
73.  different smells of rain in the country, all distinct
74.  seeing the queen
75.  when hair does right
76.  a big, complicated sandwich
77.  seeing my sweet ones love each other
78.  "How Great Thou Art."
79.  familiar creak of the front door opening
80.  new toothpaste
81.  walking out into first light, cool and still
82.  Jerusalem artichokes blooming 
83.  morning frog sounds
84.  lunches packed the night before
85.  good, peaceful mornings
86.  hometown football
87.  beautiful, lazy dusk; hearing the last of the birds
88.  newborn cousins, Mary Pearl
89.  pumpkins!!!
90.  seeing the joy while passing out allowance
91.  the beautiful and painful birth of a parent
92.  small-town post office where you sign get-well cards for the neighbors
93.  when I hear his car pull in the drive
94.  the moon bright and full, lighting the path through the yard
95.  easy meals
96.  connections with new faces, seeing yourself in someone else
97.  dishes done
98.  Asher's sincere hugs
99.  coming home after a long day
100.  needing to wipe a nose and having an actual Kleenex to do it

Have a sweet day full of gifts!


http://naturalfamilytoday.com/natural-family-friday/natural-family-friday-10314/


Thursday, September 18, 2014

Laban (yogurt)

I promised to post about this last week.  Then, you know, life and business and forgetfulness. Blah, blah, blah.  So here is the way I make my own yogurt at home.  It requires no special equipment besides a candy thermometer.  (I make it without one and will give those directions as well.)
 
First, you have to start with an amazing family cookbook that contains lots of delicious and traditional Lebanese recipes.  Thank you Nancy for sharing with our family!
 

The recipe.

 
 I like to use organic, non-additive food whenever possible.  Some weeks, it is just whatever is on sale.  I figure if I am able to get the best half of the time, that is better than never.
 
I didn't have half-n-half so I used this mixed with some milk.  (half a pint of milk, half a pint of cream, BAM! half-n-half)
 
I had my candy thermometer in place on the side of the pot.
 
 
I poured the 1/2 gallon of milk and the half-n-half, into this pot and turn the heat on medium.  Following the directions above I brought the whole thing up to 170 degrees and then took it off of the heat.  *If you do not have a thermometer, simply bring milk to an almost boil :) and take it off of the heat.  Don't let it boil or scorch.

 
I funneled it into the container I will use to store my yogurt.  It is a half gallon jar. (which actually has a permanent tea stain because I also use these to make our iced tea!  I use them for everything.)
 
 
I transfered the thermometer to the jar so I could monitor the cooling down.  It should reach between 110 and 116 degrees.  *Again, if you are doing this without a thermometer, use a clean finger to test the temp.  If you can hold your finger in the liquid and it is tolerably warm, not hot, it is ready for the starter. 
 
Make sure it is not too hot or you will kill your starter!!!
 
 
Let's talk starter.  You can use pretty much any plain, live culture yogurt.  The container should say it is cultured.  Please use plain and unsweetened!!  The highest quality yogurt that you like the flavor of is your best choice. 
 
I always use full-fat dairy but this gives you an idea of what to look for.
 
 
(I can't remember the kind of yogurt I started with because I now use my old batch for the new starter. )
 
When you are sure your milk is cool enough, thin your starter with a few Tablespoons of the warm milk. 
 
 
Next, pour the thinned starter into the warm milk mixture.  I put on my lid and give it a good shake.  Depending on your container, you might stir. 
 
This all needs to happen fairly quickly because you need to keep the heat in your mixture.  The heat will allow the cultures for the starter to change the milk mixture into lovely, tangy yogurt!
 
Here comes the creative part.  You need to keep your yogurt baby warm for several hours.  I use a few bath towels and a crock now.  But I have used a small cooler in which I placed the towel-wrapped bundle. I also have heated the oven slightly and put the whole thing in there.  (Kind of a fire hazard though.)  I would be interested to hear any other ideas that you come up with.  
 
Here, I am tightly wrapping the warm mixture.
 
 
Then I set the whole thing in my pickling crock and cover it with another towel.  If I was smart, I would have heated a few rocks to go inside the crock to make it nice and cozy.  Next time for sure!


 I push the crock out of the way overnight or for at least 8 hours.  The longer it sits the tangier it gets!
 
 
When it is done I unwrap it, always with anticipation.  The finished yogurt needs to sit in the fridge for a couple of hours before you use it.  Sometimes it is hard-set and very thick.  Other times it is thinner. 
 
(You can follow the recipe above to make a strained yogurt called Labani.  I have not done that yet but hear it is a wonderful, cream-cheese-like spread.) 
 
This can be used for so many things.  It is great to eat on it's own but I use it a lot to replace fat in other recipes.  It will also replace sour cream.
 
I have also given some of the older yogurt to our animals when I am ready to make a new batch.  They love it and get benefit from the cultures too! 
 
(Who would have thought that chickens love yogurt?) 
 
This batch was thinner but no less tasty.  It seems to get more flavorful with every batch! 


I hope this inspires some of you to try it!  Enjoy!
 
http://newlifeonahomestead.com/2014/10/mondays-homestead-barn-hop-179/


Thursday, August 28, 2014

Processing.

I have a love/hate relationship with this time of year.  I love the coming coolness of Fall, I love the sounds of school, I love the bounty of the garden.  I hate staring at that bounty and not having time to process it.  I hate the mess that processing creates.  I hate cooking dinner after I have canned all day.  Love it or hate it, the time is here.
 
 
This is the recipe I used for my first tomato sauce experience.  I followed it with the exception of using a food mill or strainer.  I like the skin and seeds.  Extra fiber and nutrition never bothered me.  Plus, I will be using this in other recipes so I doubt it will ever be noticed.
 
My sweet neighbors had an excess of tomatoes and were so kind to share.
 
 I cored them and cut out any bad spots. 
(Notice the nice new GIANT sink?!)

Then I cut the tomatoes into quarters.

I stewed them for 20 minutes.
 
I let them cool a bit before I processed them until they were smooth.  This took awhile because I had to do the 'maters in small batches.
 
Then it went back into the pot to simmer with the lid off so it will reduce into sauce.
 
Then I packed it into hot jars and water-bathed them for 40 minutes.  I can't wait to use them!
 
My joy at being done with that job was short-lived.  This was waiting for me!

Dilly beans!!!
 
I love to see the jars lined up.
 
It would not be a canning day if this did not happen at least once.  It is always disappointing.

Goodbye little jalapeƱos.
 
It's hard to be sad for long with this little toot around!